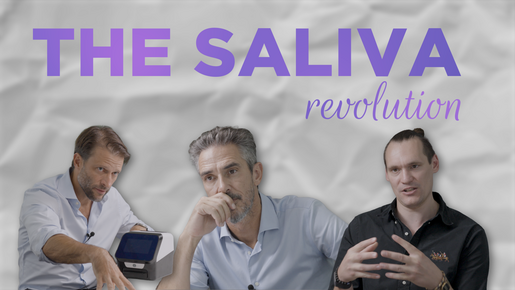
Dr Elisa Praderi and I at IDS 2025 earlier this year.

By Luken De Arbeloa
⋅ 4 min read
⋅ Updated Aug, 2025
Earlier this year, I gave a talk with Dr Elisa Praderi at IDS about how clinics are using 3D printing to create mock-ups, and how this can fit naturally into the second appointment with a patient. The mock up appointment is where we build trust and motivation. It’s where the patient really starts to see what’s possible. Having a 3D printer in the clinic allows you to make this happen faster, more efficiently and with more impact.
In this article, I’ll break down why mock ups matter, the difference between motivational and technical mock ups and how to choose the 3D printing workflow that fits best in your clinic – whether you're just getting started or already exploring the possibilities.
Understanding motivational vs. technical mock ups
There are two main types of mock ups we create with a 3D printer: motivational and technical. And they serve different purposes.
Motivational mock ups are designed to help the patient say yes. They’re fast, additive, visually striking, and usually a bit bulky. The goal here isn’t to guide a handpiece or provisionalize margins. It’s to help the patient understand the vision, feel excited and connect emotionally with the result. Everything is built on top of the existing dentition. Nothing is being reduced, and we’re not making clinical decisions at this stage.
Technical mock ups, on the other hand, come after the patient agrees to move forward. These require more precision and are used to plan or guide actual treatment. Here, we’re thinking about prep, function, surgical guides, or even crown lengthening.
This distinction is key when choosing your workflow: for motivational cases, you’re focusing on speed and esthetics, while for technical cases, you need a higher degree of control and accuracy. Both are important, but they serve very different roles in the patient journey.
No matter which method you choose, most workflows include two elements:
A model
An index or guide that helps transfer the design into the patient’s mouth
In the past, these were made with stone models and handmade silicone guides. Now, everything can be designed digitally and printed in-house.
When we’re working with motivational mock ups, we’re not aiming for perfection. These are additive, slightly bulky designs meant to look good and feel right in the patient’s mouth.
Once a case becomes technical, though, everything changes. Now we’re printing at 50 microns or less and designing with accuracy in mind.
That’s why it’s so important to understand what kind of mock up you need before you choose your workflow.
3D printing materials for dental mock ups
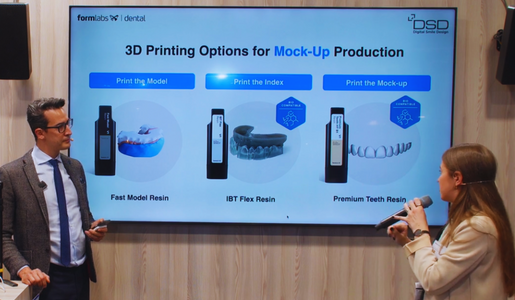
As Dr Elisa Praderi explained during our session at IDS, the right material and print settings depend on the type of mock up you're doing. For motivational mock ups, where extreme precision isn’t necessary, Fast Model Resin from the Formlabs Dental portfolio is a great option.
It prints fast, works well at 160 or 200 microns, and is ideal when you need to deliver something quickly that still looks great in the patient’s mouth. It’s also a versatile material that can be used for thermoforming aligners, retainers, or bleaching trays.For technical cases where you need more precision, such as restorative or implant models, you would switch to a different resin and lower layer height.
Three methods for 3D printing mock ups in house
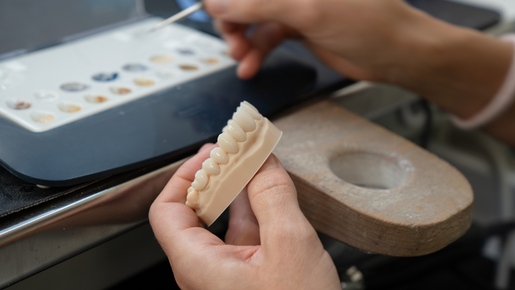
Method 1: 3D print a model and make a silicone index
This is the most traditional method and still a great starting point, especially if you're just getting into in-clinic 3D printing.
How it works:
Design the mock up
Print the model using a resin such as Fast Model Resin by Formlabs Dental
Create a silicone index over the printed model
Place the index in the patient’s mouth using flowable composite
Why it works:
This method delivers exactly what you need in the early stages of case acceptance: speed, visual impact and ease. When you have an in-clinic 3D printer, it becomes even more powerful. For dentists new to printing or just starting to integrate it into their routine, this workflow is the perfect gateway.
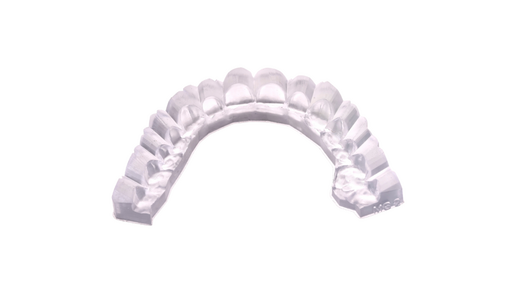
Method 2: Skip the model and print the guide
This workflow removes a few steps from the traditional process. Instead of printing a model and creating a silicone index, you go straight to printing the mock up guide itself, ready to be placed directly in the patient’s mouth.
How it works:
Design the index digitally, built from your original mock up
Place the printed guide in the patient’s mouth with Bisacril
Why it works:
We first started using this approach at DSD for our DSD Direct cases, where precision and fit are critical. But after testing the workflow extensively, we saw how efficient and accurate it was – and started using it for motivational mock ups as well. Now, this is the method we use most often when we want to skip the model and silicone index entirely.
One of the things that makes this technique so effective is how clean and controlled it is. For example, you can clean the palatal area before removing the guide, because the guide doesn’t sit on the palatal surface. You can also remove excess composite cleanly along the cervical line while the guide is still in place. That small detail makes a big difference in how polished and accurate your results look.
Even though we don’t need extreme accuracy for motivational cases, this guide can be extremely precise. The fit is sharp in the interproximal areas and more controlled than with traditional silicone. For us, this method has become the new gold standard. It’s quick, predictable and a huge step forward in consistency compared to what we used to do.
It’s not that the old method doesn’t work, it’s just that with an in-clinic printer and a printed guide, you get better results with less effort.
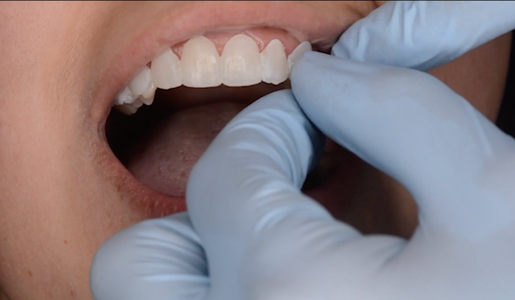
A patient has the DSD Shell placed.
Method 3: Complete indirect mock up using the DSD shell
This is the fastest and most visually impressive mock up workflow we use. It skips the index and the guide and goes straight to printing the final shape of the mock up in a tooth-colored resin.
How it works:
Design your mock up and split it into three STL shell files.
Print the shells. From the Formlabs Dental portfolio, Dr Elisa Praderi recommends Premium Teeth Resin, a tooth-colored and slightly translucent material. There are also other materials that can be used depending on availability and preference. We usually print at 100 microns, which allows us to complete the entire workflow – including post-processing – in under 40 minutes.
Fit the shells in the mouth with a small amount of flowable composite.
Why it works:
The DSD Shell workflow gives you the complete mock up in a form that's ready to go directly into the patient’s mouth: no model, no silicone index and no printed guide required. Everything is designed to be additive and motivational.
At DSD, we’ve been using and refining this technique for years. By splitting the design into three shell components, we avoid past issues with fit and fragility that came with trying to fit an entire arch in one piece.
This method has become a favorite for clinicians in our courses and many are surprised by how realistic the shells look and how quickly they can deliver that emotional impact during a first consultation. If you're looking for a way to make a strong impression without complexity, this is it.
How to choose the right 3D printing method for your workflow
There’s no one-size-fits-all when it comes to mock up workflows. As we said during the session, we now have three solid options to manufacture mock ups and there’s no excuse not to start using one of them.
It all depends on your setup, your confidence with design, and how much time you can dedicate to printing and preparation. If you only know how to design a model, go with Method 1 (print the model and use a silicone index). It’s a great place to start and gets results.
If you’re more comfortable designing guides, we’d recommend Method 2, which skips the model and prints the index directly. It takes a bit more digital skill but the results are clean and controlled.
And if you don’t want to deal with bisacryl at all, you can go straight to Method 3, the Shell workflow. It’s fast, efficient and visually impressive.
All of these methods work. No one method is better than the others. It’s simply about what works best for you, your team and your patients. With just one 3D printer, the right resin and the time you're willing to put into designing or learning, you can integrate mock ups into your workflow with no barriers.
Finding the right in-house 3D printer workflow
Bringing a 3D printer into your practice doesn’t mean you need to become a digital expert overnight. It’s about using smarter tools to make it easier to communicate with your patients, motivate them and offer a better experience overall.
You don’t have to figure it all out on your own. At DSD, we’ve tested these workflows in all kinds of real clinic situations, and we’re happy to help you figure out what makes the most sense for you. Whether it’s a small change or a full workflow shift, there’s always a way to get started that works with what you already have.If you want some help understanding what this could look like in your clinic, book a discovery call with our team. We’ll give you simple, honest advice to help you move forward.
Follow us on Instagram, Facebook, and LinkedIn to stay updated.