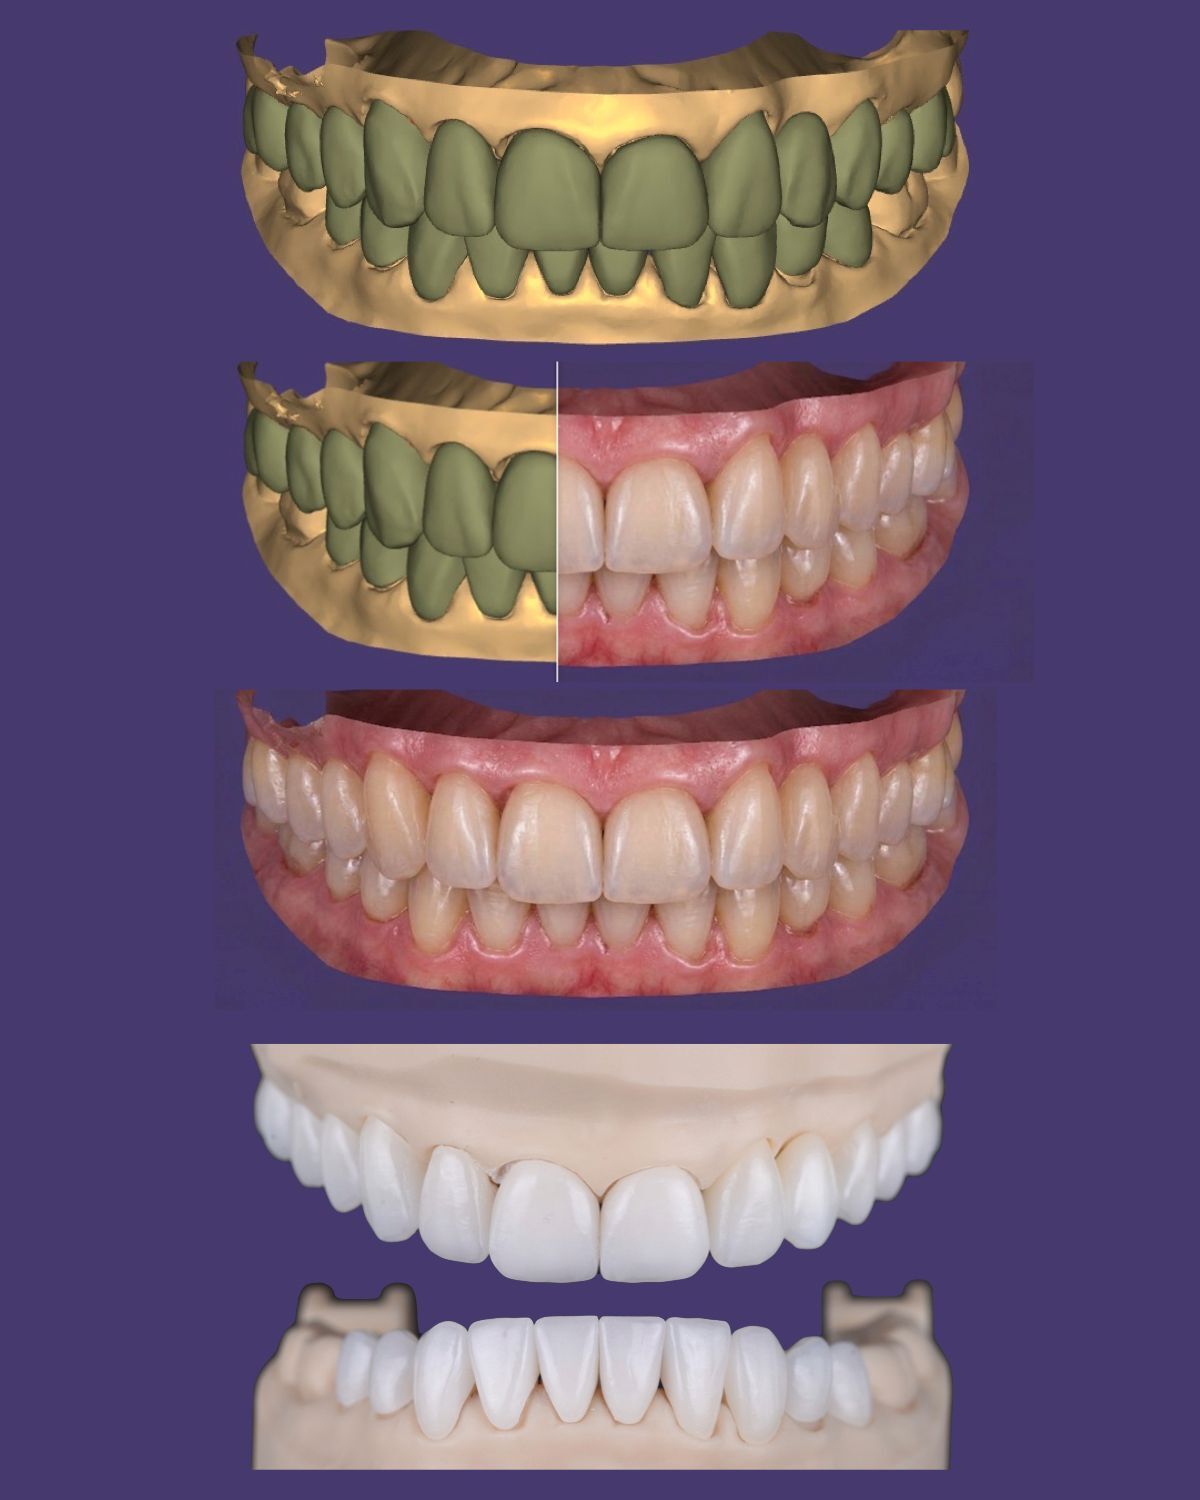
1. Create a restorative planning moment before you prep
Most dentists only interact with the restorative lab after prepping. That's a big missed opportunity.
The lab should play a key role in helping you plan how to prep better, according to occlusion, gingiva, material selection, clearance, color change, provisionalization strategy, the relationship with the design, and finishing line position. All of this should be discussed with your lab before you prep, using their experience to prep better and prepping according to what works best for the lab as well.
This shares the responsibility for the decisions. It creates accountability. It makes the lab feel even more responsible for the final outcome. And all of it is only possible to visualize in the 3D software, so ask your lab to analyze and share images of the design over the pre-prep model.
2. Let the lab guide your preparation
This means allowing the lab to define the clearance, based on their experience, to generate the pre-approved design and the desired color change. It means allowing the lab to help you with guides and digital images to plan the prep.
It's all about prep by design and guided preparation, and only the lab can help you with that.
3. Build a documentation protocol together, for each case type
Involve the lab in creating the ideal documentation protocol for each type of case. This needs to be done together, and once it's defined, it needs to be replicated exactly the same way every time.
Cases should be divided into types, because each type requires different information and documentation: quadrant case, smile makeover case, full-mouth rehab case, partial implant case, full-arch implant case, removable prosthesis case. Even today, most cases arrive at the lab missing essential information and documentation. That makes no sense, and fixing it instantly sets you apart.
4. Give your lab permission to criticize your work
This one is crucial. Proactively give your lab permission to criticize your work.
Most labs are afraid to do this. So empower them. Show them you value their perspective: that you want to learn and improve. It doesn't mean you'll always be able to do what your lab wants or prefers. But it means you'll always listen and take it into consideration.
Labs often know a great deal about things dentists don't see as often. Because of their volume, they have a much bigger sampling: they see the same challenging situations again and again. If you empower them, they'll share tips and tricks you'd never get otherwise.
5. Bring your lab into the modern restorative workflow
Define your modern restorative workflow and ask your lab if they're up for the challenge of incorporating the modern principles of restorative dentistry: concepts like monolithic natural-library restorations, copy-paste dentistry, guided dentistry, asynchronous and visual communication, interdisciplinary simulations, ortho-restorative digital integration, and facially driven design and planning.
Make the journey into these concepts a shared dentist–lab journey. You grow together.
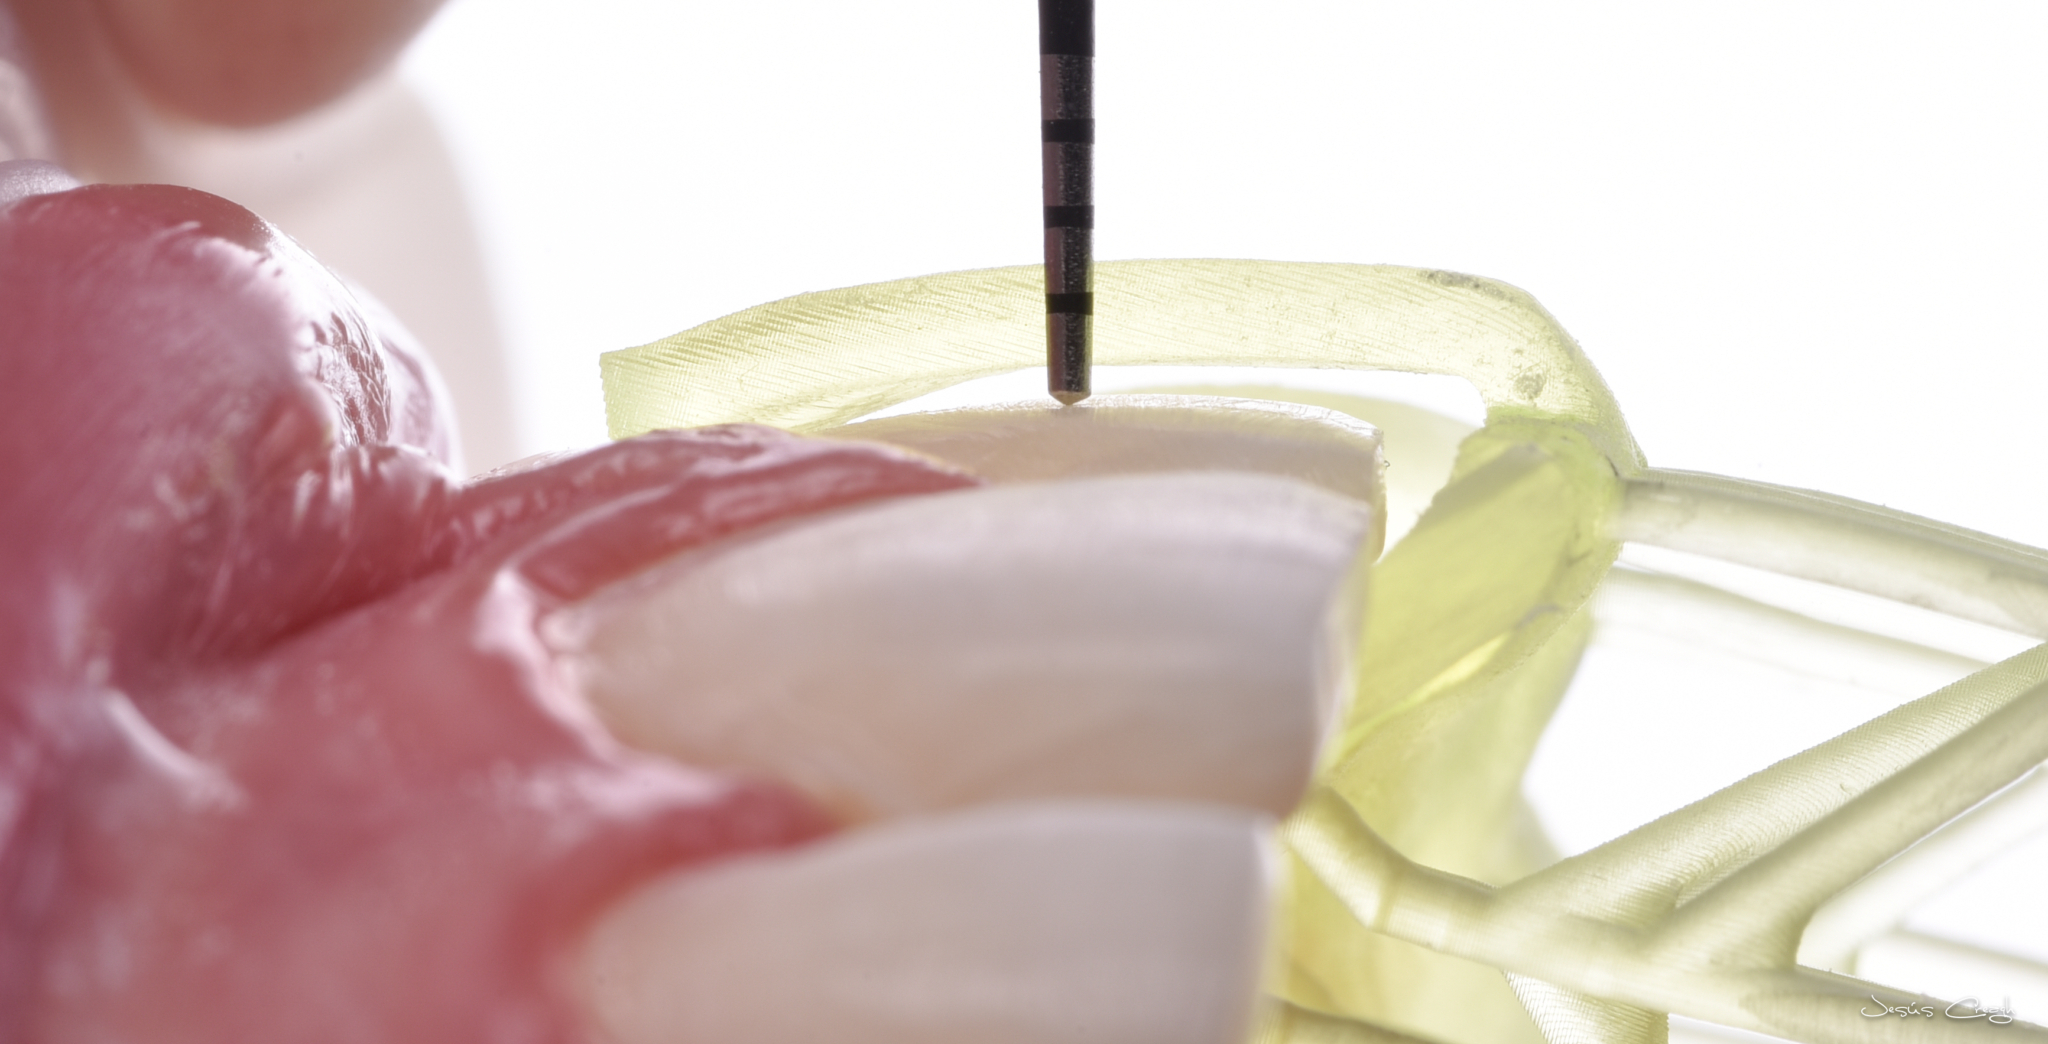
6. Approve the finishing line before the lab designs
It makes no sense for a lab to design the finishing line of a prep over a model without the dentist approving it. It's simply too risky. Nobody knows better than the dentist exactly where they finished the prep, and that matters even more today, with very small chamfers and vertical preps.
Either the dentist defines it in the software, or the lab does it and the dentist approves it before proceeding with the design. Create a workflow with your lab that allows you to see it and sign off on it.
7. Approve the digital design before manufacturing
In the same spirit, it makes no sense to manufacture anything without the dentist approving the digital design first. It's too risky.
It's so easy nowadays to share images and links on your phone. The dentist can spend just a few minutes evaluating the design, following a predetermined checklist (one I share in my lectures) to make sure everything is right. This way, you don't waste time, money or materials on manufacturing, and you drastically reduce the need for changes afterward.
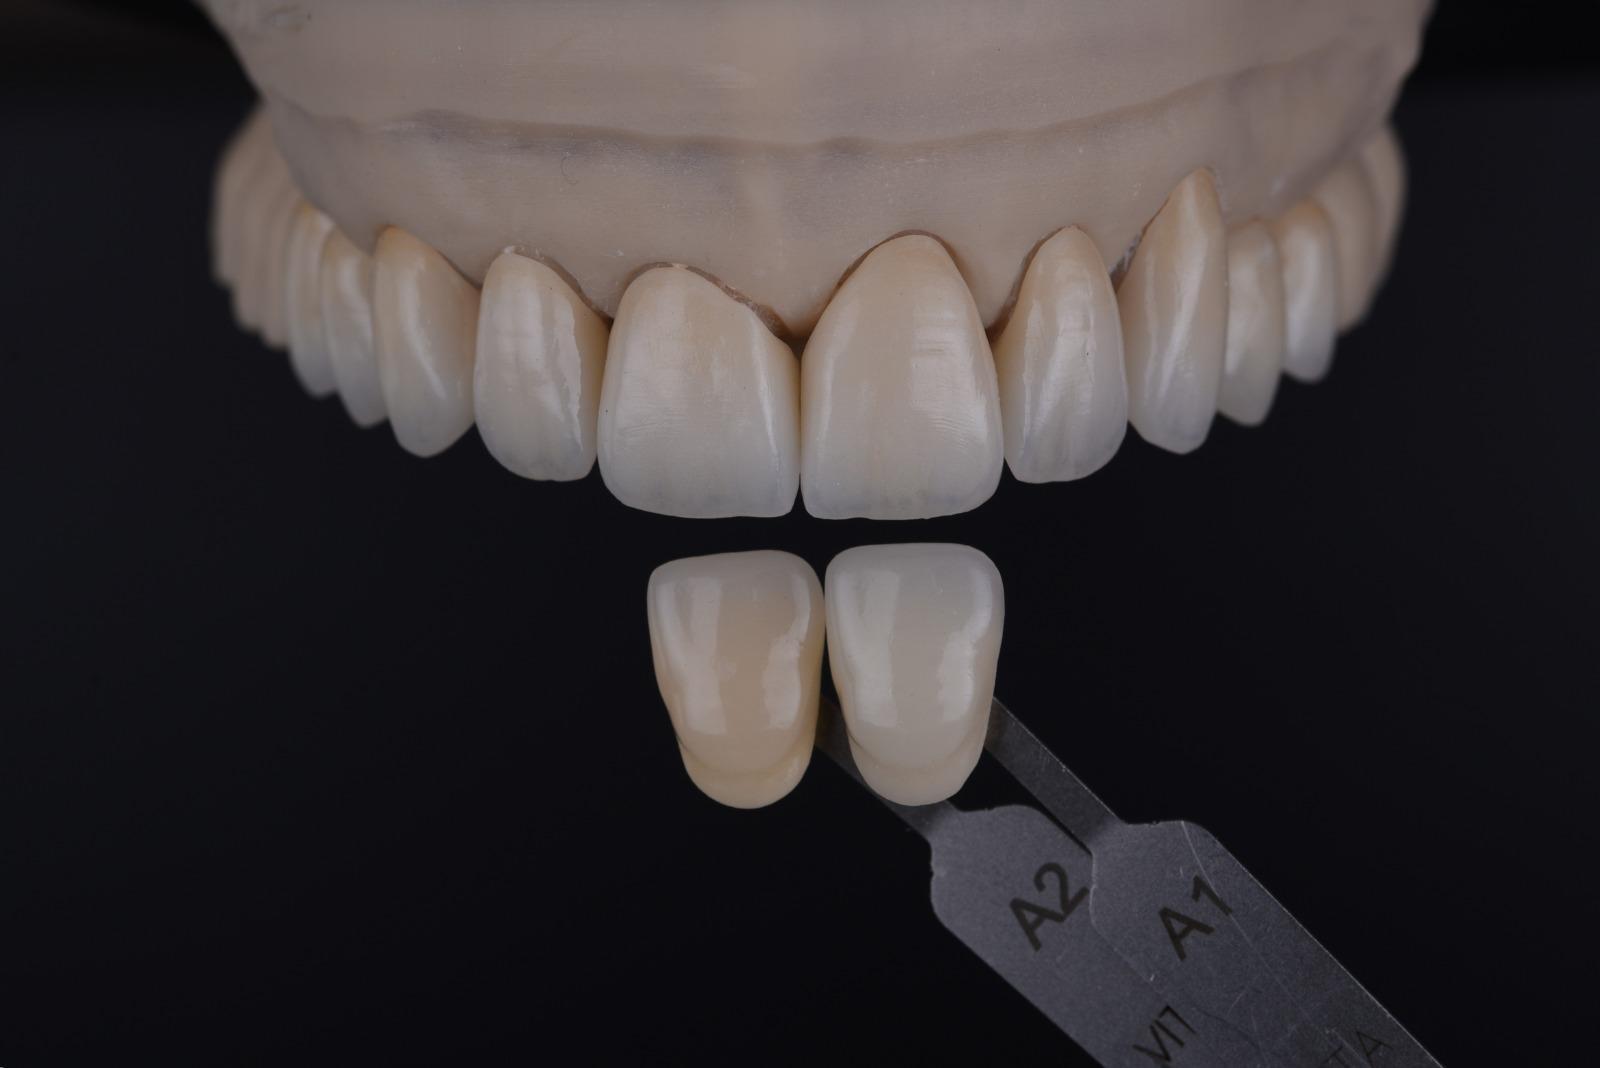
8. Check final photos and videos before the restoration ships
It makes no sense for a lab to ship a restoration without first allowing the dentist to check final photos and videos of the work over the model.
There are many relevant details that are easy to spot, and simple improvements that can still be made, at this stage. It makes no sense to discover those things only once you've received the box and opened it in the clinic. Develop this protocol of pre-shipping images with your lab.
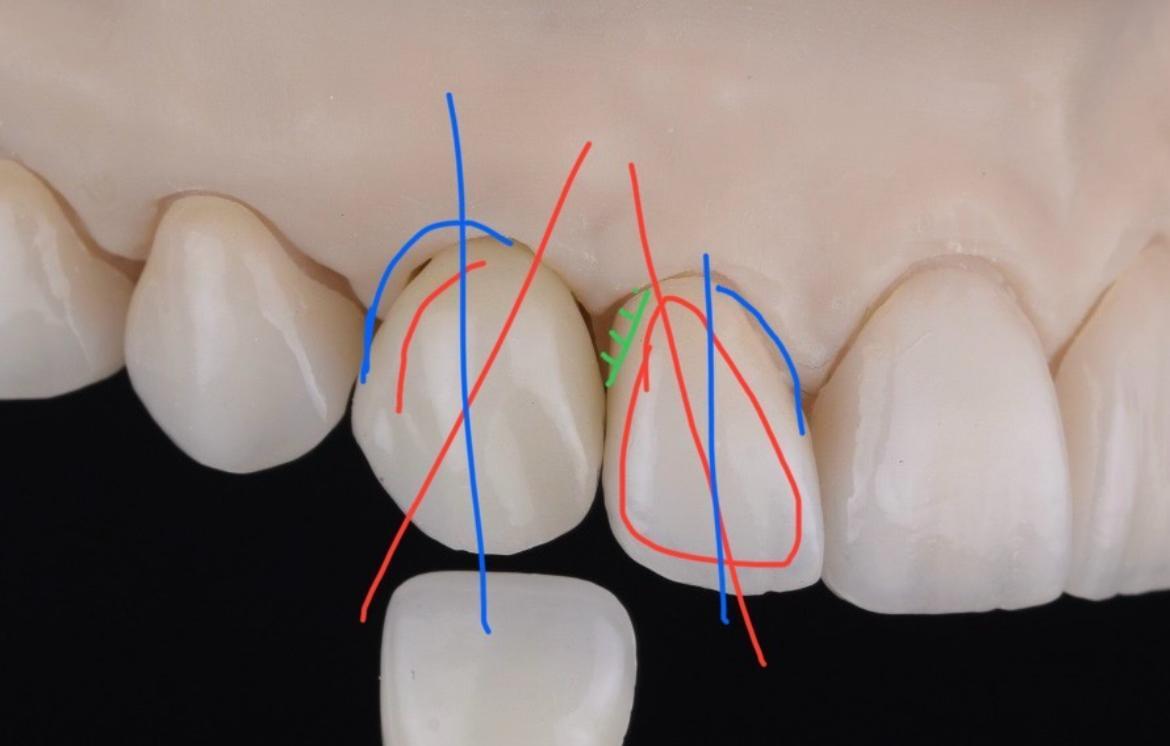
9. Master visual communication at the try-in
Even after following all of the above, sometimes during the try-in you'll identify necessary changes or improvements. When that happens, master the art of using your phone, images, videos, drawings and notes, to visually explain what you need.
Don't rely only on written notes. It makes no sense to communicate dentistry without images. Transform your phone into the third eye of your lab.
Earning your place on the list
None of these ten suggestions are complicated. What they have in common is a mindset: treating your lab as a true partner in the clinical process, not as a supplier at the end of it. Care about the work, raise the quality of your own dentistry, and show respect for the expertise you're paying for, and you'll find yourself on that small, exclusive list before you know it.